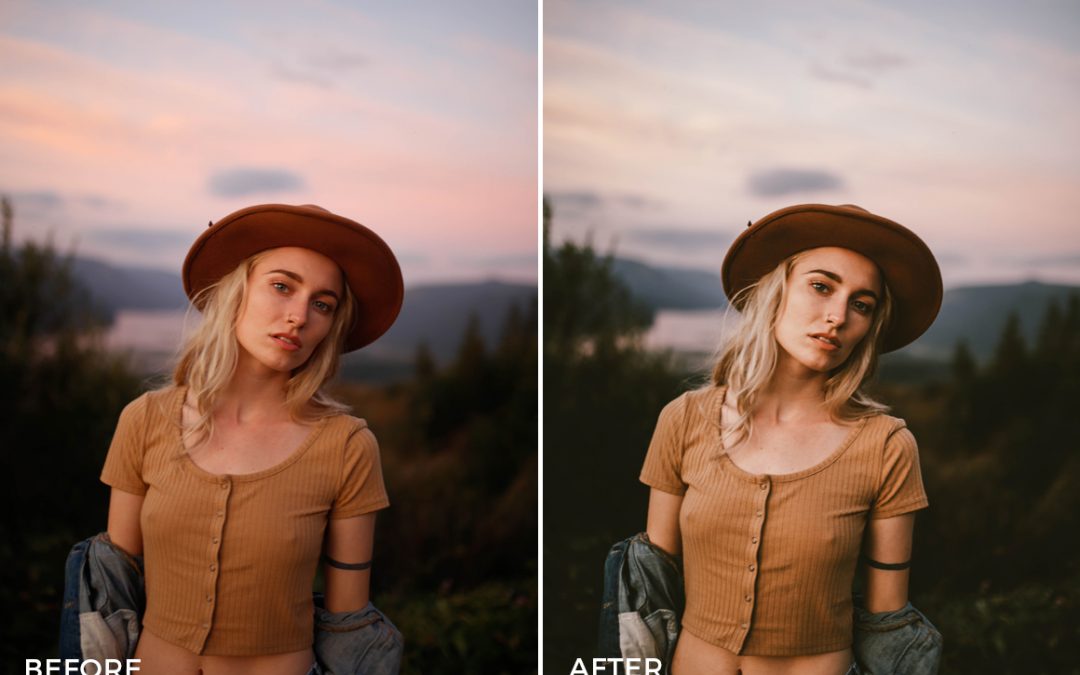
In our last post, we started such a useful topic for every Instagrammer as how to use one of the most popular applications allowing to beautify photos. Lightroom can transform even the simplest image into something amazing and awe-inspiring. InstaBF, one of the leading Instagram and IGTV providers of the industry, already explained why it’s so beneficial to use this application and how important it is to pick up the right format for both a desktop and mobile devices. And now we are going to pass to explaining exactly what steps must be undertaken to have your photos transformed from ordinary to mind-blowing with this tool straight on your mobile device.
How to Edit with Lightroom Presets on the Mobile Application
Lightroom CC mobile application is a wonderful tool for those Instagrammers, who are used to taking photos with their smartphones and editing them right on the go to add to their feeds as soon as possible. The application is a quick one, as well as easily navigated and what’s more attractive – absolutely free of charge!
However, once you have downloaded it through Google Play or App Store (depending on your gadget), you will have to spend some money and purchase the preset that best suits your unique style and have it set up in your phone. For this, open the zip folder you see after the download is over. Once done, you will find a .DNG file – your mobile preset. Using email, Google Drive, Dropbox or airdrop, send it to your smartphone. Open it as a photo or an un-edited photo in your files (depends on how it will be shown in your device). After this, import the photo right to your Lightroom CC mobile app. To do this, tap the right bottom corner and click the Add New Photo button. This will open your camera roll. Choose the image you’ll like to edit and tap “Add Photos”. To do this free of charge, copy the preset settings from the original photo and paste them on that particular one.
Passing to Editing
Now you already have the preset photo installed and it is high time to use it for adding other images. It will be expedient to create a folder in the application for every preset to find it later easily once needed.
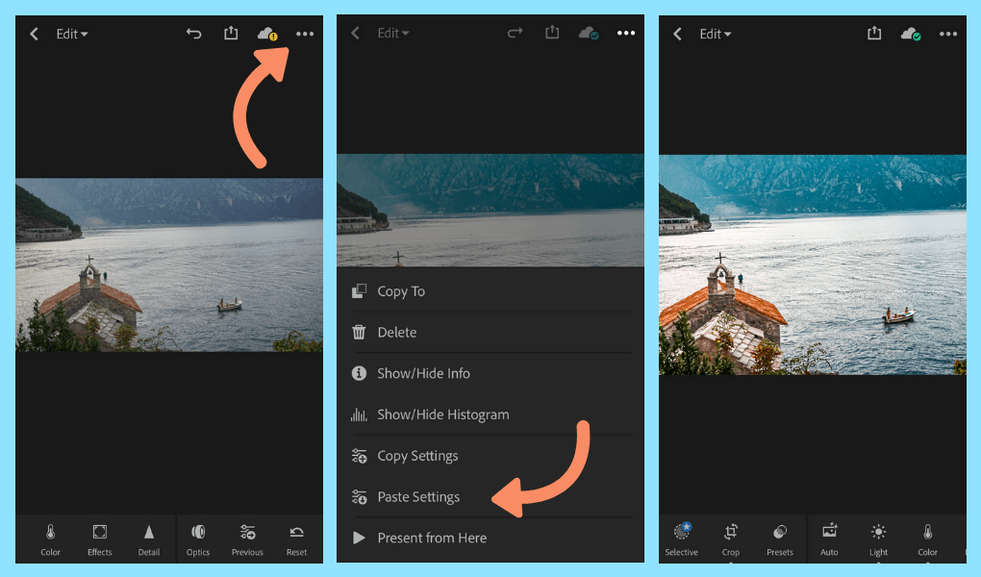
There are 3 dots in the top right-hand corner of every image you want to edit with this tool. Tap them and select the Copy image Settings. After this, see if all the points marked in the box opened, and click OK. Get back to All Photos and open the image to be edited. Click the 3 dots on the right top corner and choose Paste Image Settings. After this little manipulation, you will see the preset applied to the image!
Adding Extra Tweaks
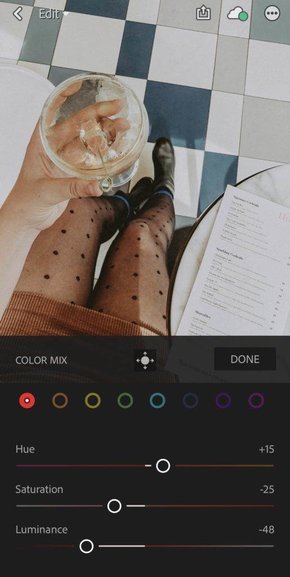
Anyway, if there are still some adjustments you consider necessary for a perfectly polished look of the image, you can make them before saving the image. For this, get the editing tools Contrast, Exposure, and Highlights at the bottom of the bar. With the color button, you can play with any color in the image, while the Mix button is designed for changing the Saturation, Hue, and Luminance of all the colors one by one. After the image looks perfect in your eyes, tap and hold the screen on the image and see how it looked before editing and after it. Click on the Export button (you can find it on the right top corner) and save the image either to your files or camera roll.